How to Add a QR Code in Canva: A Step-by-Step Guideكيف تُضيف رمز QR في Canva: دليل خطوة بخطوة
Canva is the design tool every MENA SMB and freelancer already uses. Adding a QR code to a Canva design takes four steps and about a minute — but the version most tutorials skip is how to make the QR actually scan once it’s printed. Here’s the full path, plus the print-readiness gotchas.Canva هي أداة التصميم التي يستخدمها بالفعل كلّ صاحب عمل صغير ومستقلّ في الشرق الأوسط. إضافة رمز QR إلى تصميم Canva تأخذ أربع خطوات ودقيقة تقريباً — لكنّ الجزء الذي تتخطّاه معظم الشروحات هو كيف تجعل الرمز يُقرأ فعلاً بعد الطباعة. إليك المسار الكامل، إضافةً إلى محاذير الجاهزيّة للطباعة.
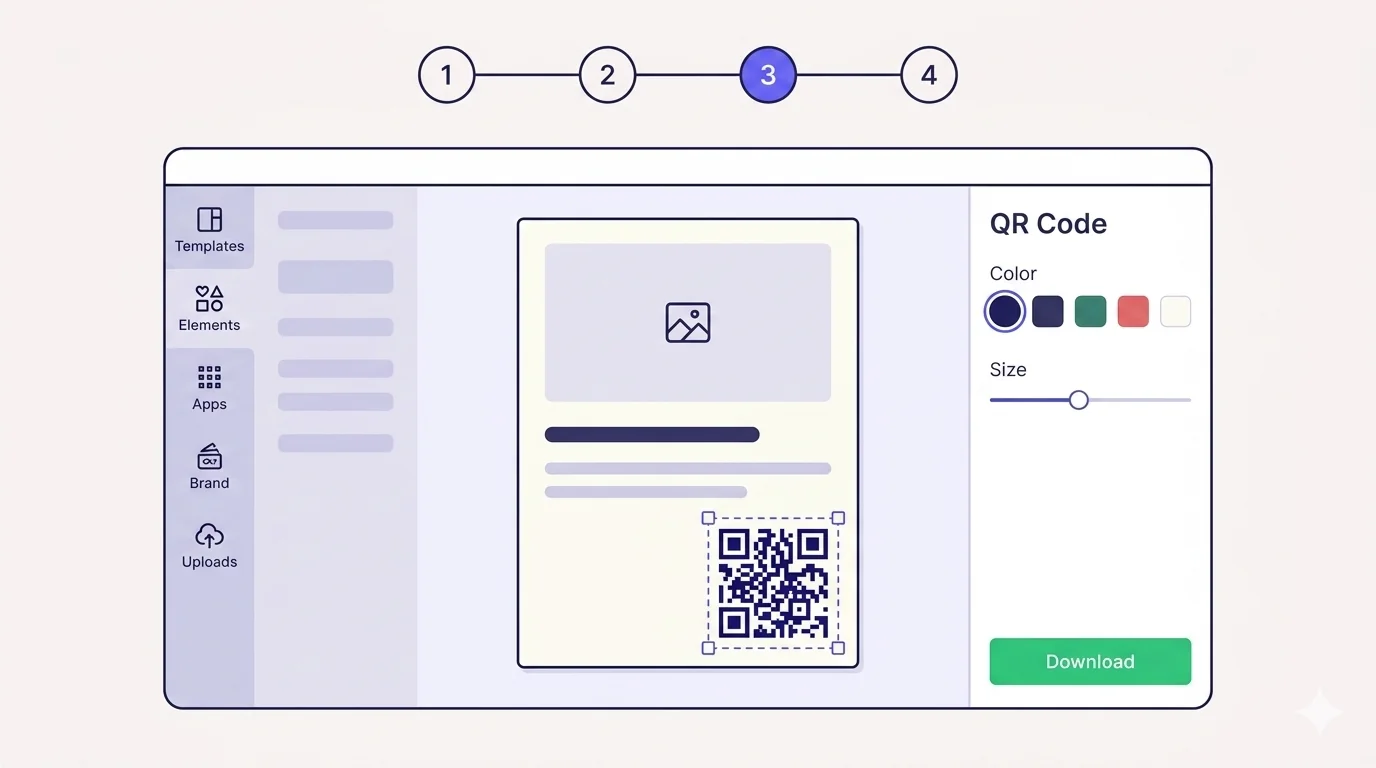
Canva is the dominant design tool across MENA — SMBs use it for menus and flyers, freelancers use it for client decks, agencies use it as a final-mile production layer over more sophisticated tools. Adding a QR code to a Canva design takes four steps and about a minute. The version most tutorials skip is how to make sure the QR actually scans once it’s printed, which is the part you find out about after you’ve sent the print job. This guide covers both — the click path and the print-readiness gotchas.
The four-step Canva workflow
Step 1 — Open your Canva design
Open the Canva project you want to add the QR to — a poster, a flyer, a menu, a business card, an Instagram post, anything. Position your work area so the spot where the QR will live is visible on screen. The QR is going to need real estate (more on sizing in a moment), so don’t squeeze it into the only empty corner left.
Step 2 — Find the QR element
In Canva’s left sidebar, click ‘Apps’ (the icon with four squares). In the search box, type ‘QR’. Canva’s built-in QR app will appear at the top — it’s free, no install required. Click it to open the QR generator panel.
Alternatively: under ‘Elements’ in the sidebar, search for ‘qr’ — Canva also surfaces a few QR-related stickers and decorative elements there, but those are decorative only and don’t generate scannable codes. Use the Apps version when you need a code that actually scans.
Step 3 — Enter your URL or content
In the QR app panel, paste the URL you want the QR to point to. Canva’s built-in QR generator only handles URLs and plain text — for vCards, Wi-Fi credentials, or any of the dynamic destination types, you’ll need to generate the QR elsewhere (more on this below) and upload the resulting image instead.
Click ‘Generate code’. The QR appears in your design. Drag it to position. You can resize using the corner handles — but be careful: shrinking the QR below a printable size is the single most common reason printed Canva designs fail to scan.
Step 4 — Customise color (carefully) and download
Canva lets you change the foreground and background colours of the generated QR. The temptation is to match brand colours; the trap is that contrast is what determines scannability. Stay with dark-on-light. If you must use brand colours, keep the modules dark (deep brand colour) on a light background, never the inverse, and run a test scan with at least two phones before exporting to print.
Once the design is ready, click ‘Share’ → ‘Download’. For print, choose PDF Print (CMYK) — not PDF Standard, not PNG. CMYK is what your printer needs to reproduce colours accurately on paper. PNG is fine for digital use only.
The print-readiness checks most tutorials skip
A QR that looks crisp on screen at 800px wide can fail completely when printed at 2 cm wide on a glossy menu insert. Before you commit to a print run, check these four things:
- Final printed size — the QR should be at least 2 cm wide on the printed page for most use cases. For a yard sign or poster scanned from across a room, larger. The 10:1 rule of thumb: maximum scan distance is roughly ten times the printed code width.
- Quiet zone — at least 4 modules of clear space (roughly 5 mm at standard print sizes) around the QR with no other content. Canva’s QR element doesn’t enforce this; you have to leave the whitespace yourself.
- Contrast — print a single test page and look at it in normal lighting. If the QR feels visually muted, it will feel worse to a phone camera. Bump up the contrast or revert to black-on-white.
- Real device test — print one copy at the final size, on the final paper stock, and scan it with at least two different phones (one iPhone, one Android — ideally one of them more than two years old). If both scan reliably from the expected distance, you’re ready for the volume run.
When you should NOT use Canva’s built-in QR generator
Canva’s QR app is free and convenient, but it generates a static QR — the URL is baked into the dot pattern, and you can never change the destination without editing the design and reprinting. That’s fine for a permanent URL like a homepage. It is not fine for marketing campaigns, menus, or any link that might change later.
When you need a dynamic QR (one where you can change the destination after printing), generate it in a dedicated tool like QRA, then upload the resulting image into Canva via ‘Uploads’ in the sidebar. The visual workflow is identical — drag, position, resize — but you keep the ability to change where the QR points without re-touching the Canva design or reprinting anything.
Other situations where you should generate the QR outside Canva and upload it: when you need a vCard or Wi-Fi credentials encoded; when you need scan analytics; when you need a custom frame, embedded logo, or styled corners that Canva’s QR generator doesn’t support; when you need a vector export (Canva’s QR is rendered as a raster image).
How QRA pairs with Canva
Generate the QR in QRA — pick a type (URL, vCard, Wi-Fi, menu, multi-link, anything), customise the design (logo, colors, frame, error-correction level), then export as SVG or PNG. Open the file’s ‘Uploads’ tab in Canva, drop the file in, and place it on your design like any other element. You get the polish of Canva for the surrounding layout, the scan-reliability of a dedicated QR generator, and the option to update the destination later — without ever opening Canva again.
The short answer
Canva’s built-in QR works for static URLs in non-critical print jobs. For anything you might want to update later, anything that needs analytics, anything with branding requirements, generate the QR outside Canva and upload it. Either way, print a test copy at final size and scan with two different phones before committing to volume — that single 10-minute check saves more reprints than any other quality step.
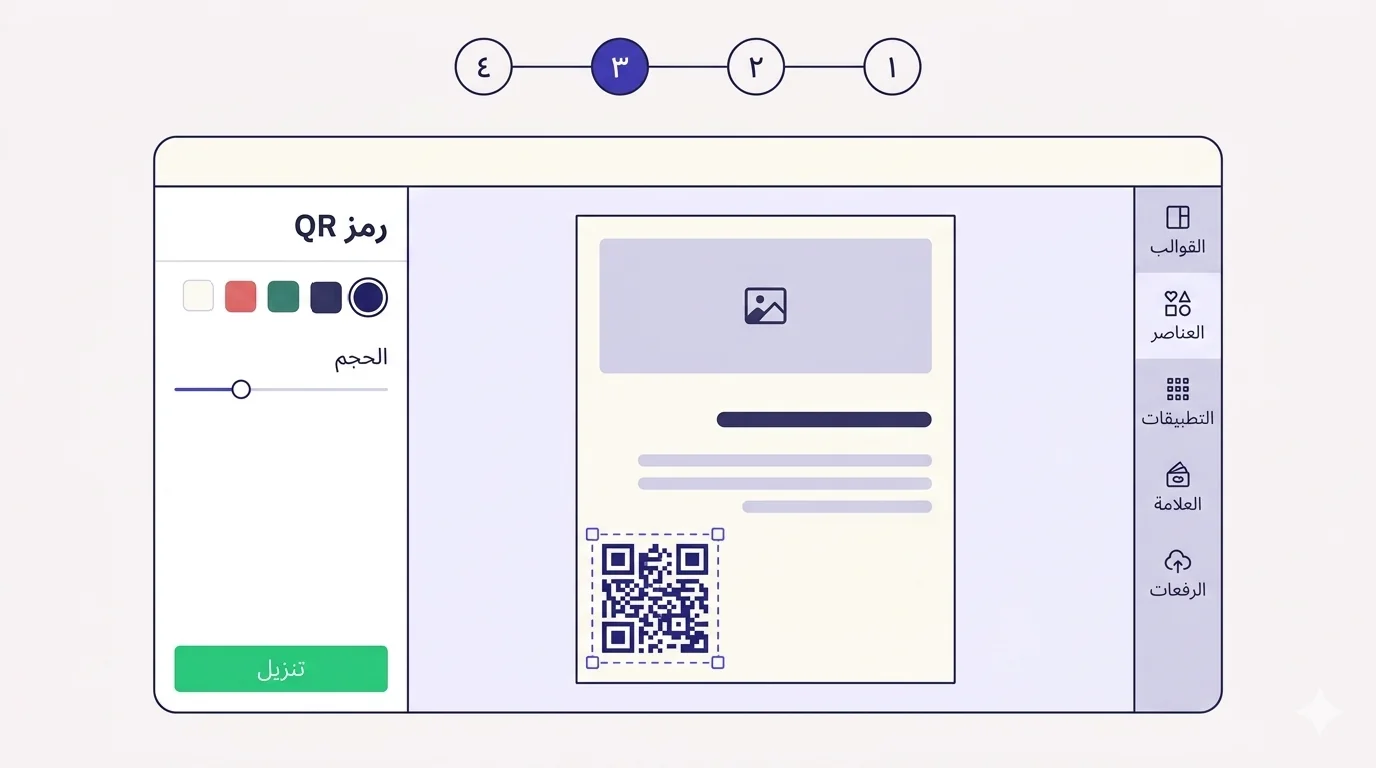
Canva هي أداة التصميم المهيمنة في الشرق الأوسط — أصحاب الأعمال الصغيرة يستخدمونها للقوائم والنشرات، والمستقلّون لعروض العملاء، والوكالات كطبقة إنتاج نهائيّة فوق أدوات أكثر تطوّراً. إضافة رمز QR إلى تصميم Canva تستغرق أربع خطوات ودقيقة تقريباً. الجزء الذي تتخطّاه معظم الشروحات هو كيف تتأكّد من أنّ الرمز يُمسح فعلاً بعد الطباعة، وهذا الجزء تكتشفه بعد أن ترسل ملفّ الطباعة. هذا الدليل يغطّي الاثنين — مسار النقرات ومحاذير الجاهزيّة للطباعة.
مسار العمل في Canva بأربع خطوات
الخطوة ١ — افتح تصميم Canva
افتح مشروع Canva الذي تريد إضافة الرمز إليه — ملصق، نشرة، قائمة طعام، بطاقة عمل، منشور إنستغرام، أيّ شيء. ضع منطقة العمل بحيث يكون المكان الذي سيعيش فيه الرمز ظاهراً على الشاشة. سيحتاج الرمز إلى مساحة (المزيد عن المقاس بعد قليل)، فلا تحشره في الزاوية الفارغة الوحيدة المتبقّية.
الخطوة ٢ — اعثر على عنصر QR
في الشريط الجانبي اليساري في Canva (أو الأيمن في الواجهة العربيّة)، اضغط على «التطبيقات» (الأيقونة بأربعة مربّعات). في مربّع البحث، اكتب «QR». تطبيق QR المدمج في Canva سيظهر في الأعلى — مجّاني، لا يحتاج تثبيتاً. اضغطه لفتح لوحة مولّد QR.
بديلاً: تحت «العناصر» في الشريط الجانبي، ابحث عن «qr» — يعرض Canva أيضاً بعض الملصقات والعناصر الزخرفيّة المتعلّقة بـ QR هناك، لكنّها زخرفيّة فقط ولا تُولّد رموزاً قابلة للمسح. استخدم نسخة «التطبيقات» حين تحتاج رمزاً يُمسح فعلاً.
الخطوة ٣ — أدخل الرابط أو المحتوى
في لوحة تطبيق QR، الصق الرابط الذي تريد أن يشير إليه الرمز. مولّد QR المدمج في Canva يدعم فقط الروابط والنصوص العاديّة — لبطاقات التعارف، أو بيانات الواي فاي، أو أيّ نوع وجهات ديناميكيّة، تحتاج إلى توليد الرمز في مكان آخر (المزيد أدناه) ورفع الصورة الناتجة.
اضغط «إنشاء الرمز». يظهر الرمز في تصميمك. اسحبه إلى الموضع المناسب. يمكنك تغيير حجمه باستخدام المقابض الزاويّة — لكن انتبه: تصغير الرمز إلى حجم لا يصلح للطباعة هو السبب الأشيع لفشل تصاميم Canva المطبوعة في المسح.
الخطوة ٤ — خصّص اللون (بحذر) ونزّل
يتيح لك Canva تغيير لوني المقدّمة والخلفيّة للرمز المُولَّد. الإغراء هو مطابقة ألوان العلامة التجاريّة؛ والفخّ هو أنّ التباين هو ما يحدّد قابلية المسح. التزم داكن-على-فاتح. إن وجب استخدام ألوان العلامة، أبقِ الوحدات داكنة (لون العلامة الغامق) على خلفيّة فاتحة، لا العكس أبداً، واختبر المسح بهاتفين على الأقل قبل التصدير للطباعة.
حين يكون التصميم جاهزاً، اضغط «مشاركة» ثمّ «تنزيل». للطباعة، اختر PDF Print (CMYK) — لا PDF القياسي، ولا PNG. صيغة CMYK هي ما يحتاجه طابعك لإعادة إنتاج الألوان بدقّة على الورق. أمّا PNG فمناسب للاستخدام الرقمي فقط.
فحوصات الجاهزيّة للطباعة التي تتخطّاها معظم الشروحات
رمز يبدو حادّاً على الشاشة بعرض ٨٠٠ بكسل قد يفشل تماماً حين يُطبع بعرض ٢ سم على إدخال قائمة لامع. قبل أن تلتزم بطباعة الكميّة، تحقّق من أربعة أمور:
- الحجم النهائي للطباعة — يجب أن يكون عرض الرمز لا يقلّ عن ٢ سم على الصفحة المطبوعة لمعظم الاستخدامات. للافتة فناء أو ملصق يُمسح من عرض غرفة، أكبر. قاعدة ١٠:١ التقريبيّة: أقصى مسافة مسح تساوي تقريباً عشرة أضعاف عرض الرمز المطبوع.
- المنطقة الهادئة — لا تقلّ عن ٤ وحدات من المساحة الصافية (تقريباً ٥ ملم بمقاسات الطباعة الاعتياديّة) حول الرمز دون أيّ محتوى آخر. عنصر QR في Canva لا يفرض ذلك تلقائيّاً؛ عليك أن تترك المساحة بنفسك.
- التباين — اطبع صفحة اختبار واحدة وانظر إليها في الإضاءة الاعتياديّة. إن شعرت أنّ الرمز باهت بصريّاً، فسيكون أسوأ بالنسبة لكاميرا الهاتف. ارفع التباين أو ارجع إلى أسود-على-أبيض.
- اختبار جهاز حقيقي — اطبع نسخة واحدة بالحجم النهائي، على نوع الورق النهائي، وامسحها بهاتفين مختلفين على الأقل (iPhone واحد، Android واحد — يُفضّل أن يكون أحدهما أكبر من سنتين). إن قرأ الاثنان من المسافة المتوقّعة بثبات، فأنت جاهز للطباعة بالكميّة.
متى يجب ألّا تستخدم مولّد QR المدمج في Canva
تطبيق QR في Canva مجّاني ومريح، لكنّه يُولّد رمزاً ثابتاً — الرابط مدمج في نمط النقاط، ولا تستطيع أبداً تغيير الوجهة دون تعديل التصميم وإعادة الطباعة. هذا مناسب لرابط دائم كصفحة رئيسيّة. وهو غير مناسب للحملات التسويقيّة أو القوائم أو أيّ رابط قد يتغيّر لاحقاً.
حين تحتاج رمزاً ديناميكيّاً (يمكنك تغيير وجهته بعد الطباعة)، ولّده في أداة مخصّصة مثل QRA، ثمّ ارفع الصورة الناتجة إلى Canva عبر «الرفعات» في الشريط الجانبي. مسار العمل البصري متطابق — اسحب، ضع، غيّر الحجم — لكنّك تحتفظ بالقدرة على تغيير وجهة الرمز دون لمس تصميم Canva أو إعادة طباعة شيء.
حالات أخرى يجب فيها توليد الرمز خارج Canva ورفعه: حين تحتاج تشفير بطاقة تعارف أو بيانات واي فاي؛ حين تحتاج تحليلات مسح؛ حين تحتاج إطاراً مخصّصاً، أو شعاراً مدمجاً، أو زوايا منمّقة لا يدعمها مولّد Canva؛ حين تحتاج تصدير متّجهي (رمز Canva يُرسم كصورة نقطيّة).
كيف تترافق QRA مع Canva
ولّد الرمز في QRA — اختر النوع (رابط، بطاقة تعارف، واي فاي، قائمة، روابط متعدّدة، أيّ شيء)، خصّص التصميم (شعار، ألوان، إطار، مستوى تصحيح أخطاء)، ثمّ صدّر بصيغة SVG أو PNG. افتح تبويب «الرفعات» في Canva، أسقط الملفّ فيه، وضعه على تصميمك كأيّ عنصر آخر. تحصل على لمسة Canva لباقي التخطيط، وموثوقيّة المسح من مولّد QR مخصّص، وخيار تحديث الوجهة لاحقاً — دون فتح Canva مرّة أخرى.
الإجابة المختصرة
مولّد QR المدمج في Canva يصلح للروابط الثابتة في مهام الطباعة غير الحرجة. لأيّ شيء قد ترغب في تحديثه لاحقاً، أو يحتاج تحليلات، أو له متطلّبات علامة تجاريّة، ولّد الرمز خارج Canva وارفعه. وفي الحالتين، اطبع نسخة اختبار بالحجم النهائي وامسحها بهاتفين مختلفين قبل الالتزام بالكميّة — هذا الفحص الذي يستغرق ١٠ دقائق يوفّر إعادات طباعة أكثر من أيّ خطوة جودة أخرى.
Ready to make a smarter QR?جاهز لإنشاء رمز QR أذكى؟
Sign up free — no card needed. Track every scan, edit destinations anytime.سجّل مجاناً — بدون بطاقة. تتبّع كل عملية مسح وعدّل الوجهة في أي وقت.